Getting-started
(Optional) Clone the repository
This can be skipped if you only want the python package
Here's a step-by-step tutorial on how to clone the GitHub repository of matsim-output-postgreSQL-converter to your local machine using git:
Install git on your machine if you haven't already.
=> If you don't know what git is, here is a guide
=> If you just want to install it, check hereOpen your terminal or command prompt and navigate to the directory where you want to clone the repository.
Type the command
git clone https://github.com/gabRpt/matsim-output-postgreSQL-converter.gitand press Enter.Wait for the cloning process to complete. This may take a few minutes depending on the size of the repository.
Once the cloning process is complete, you should see a new directory named
matsim-output-postgreSQL-converterin the directory where you cloned the repository.
(Optional) Setup the database
This can be skipped if you have a remote database with postGIS installed
Step 1: Install PostgreSQL with postGIS extension
If you already have PostgreSQL installed, go to the point n°3
Go to the official PostgreSQL website (https://www.postgresql.org/) and download the PostgreSQL installer for your operating system.
Run the installer and follow the installation wizard to complete the installation process. Make sure to select the option to install postGIS extension during the installation process.
Once the installation is complete, open the PostgreSQL Stack Builder, which should have been installed along with PostgreSQL.
In the Stack Builder, select the version of PostgreSQL that you installed and click "Next".
In the "Select Categories" window, expand the "Spatial Extensions" category and select "postGIS" and any other extensions you want to install.
Click "Next" and follow the instructions to complete the installation of postGIS extension.
Step 2: Set up the binary paths in pgAdmin4
- If you don't have pgAdmin4 installed, download and install it from the official pgAdmin website (https://www.pgadmin.org/).
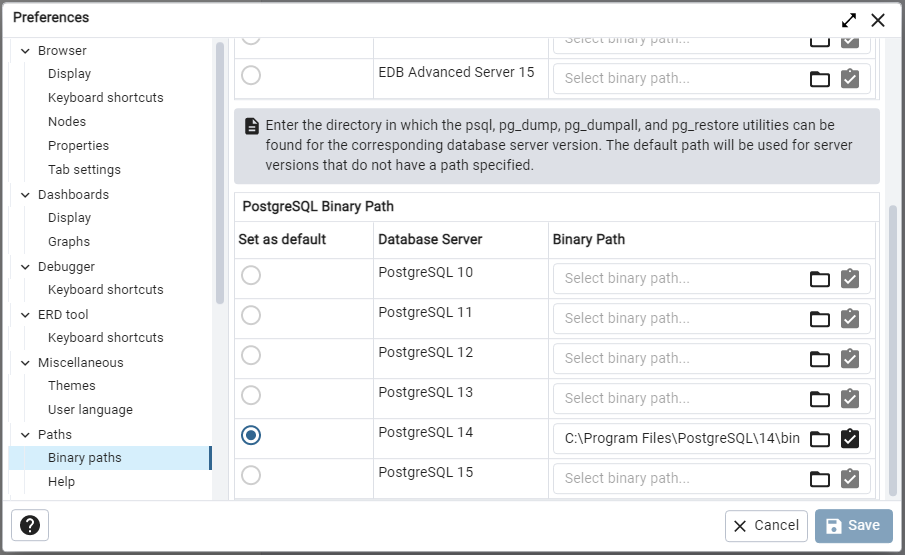
Open pgAdmin4 and go to "File" > "Preferences" > "Paths".
In the "Binary paths" tab, scroll down to "PostgreSQL Binary Path" and click add the binary path in the field corresponding to the version of PostgreSQL you installed.
Browse to the directory where PostgreSQL is installed (e.g. C:\Program Files\PostgreSQL\14\bin) and select it.
Click "Select" to save the path.
Step 3: Create a database
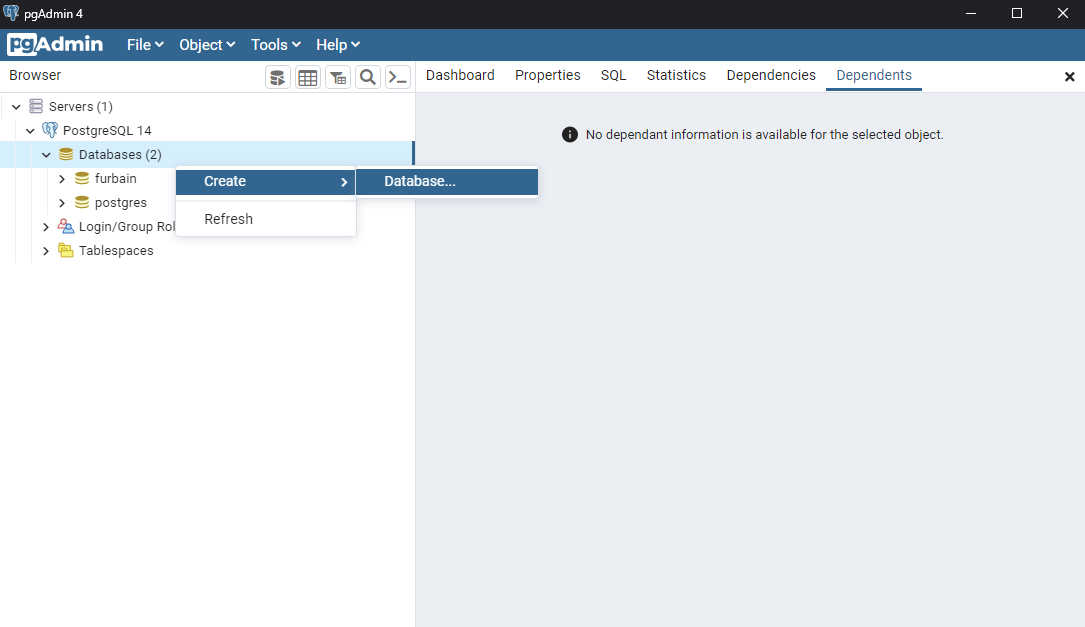
- In pgAdmin4, on the left panel, right-click on "Databases" and select "Create" > "Database".
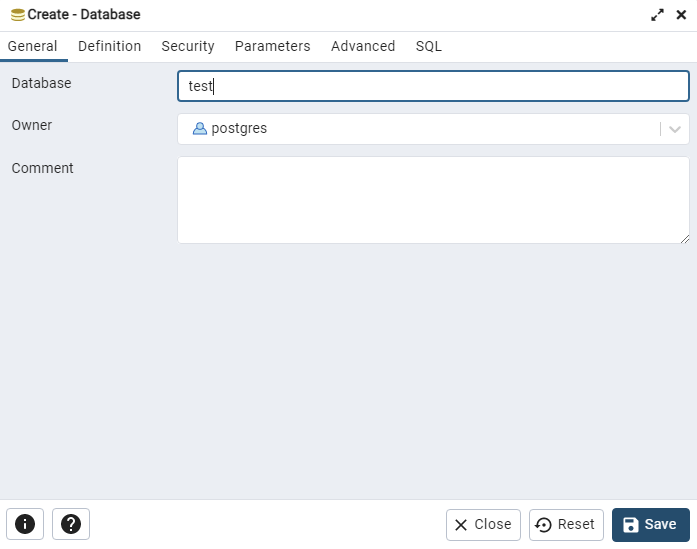
In the "Create - Database" window, enter a name for the new database and leave the other options at their default values.
Click "Save" to create the database.
Setup the environment
For this part, I am using Anaconda
- Install
Anacondaon your machine. You can follow the instructions in this guide. Direct download here.
Open Anaconda Navigator and navigate to the
Environmentstab in the left panel.Click on the
Createbutton and enter a name for the new environment.
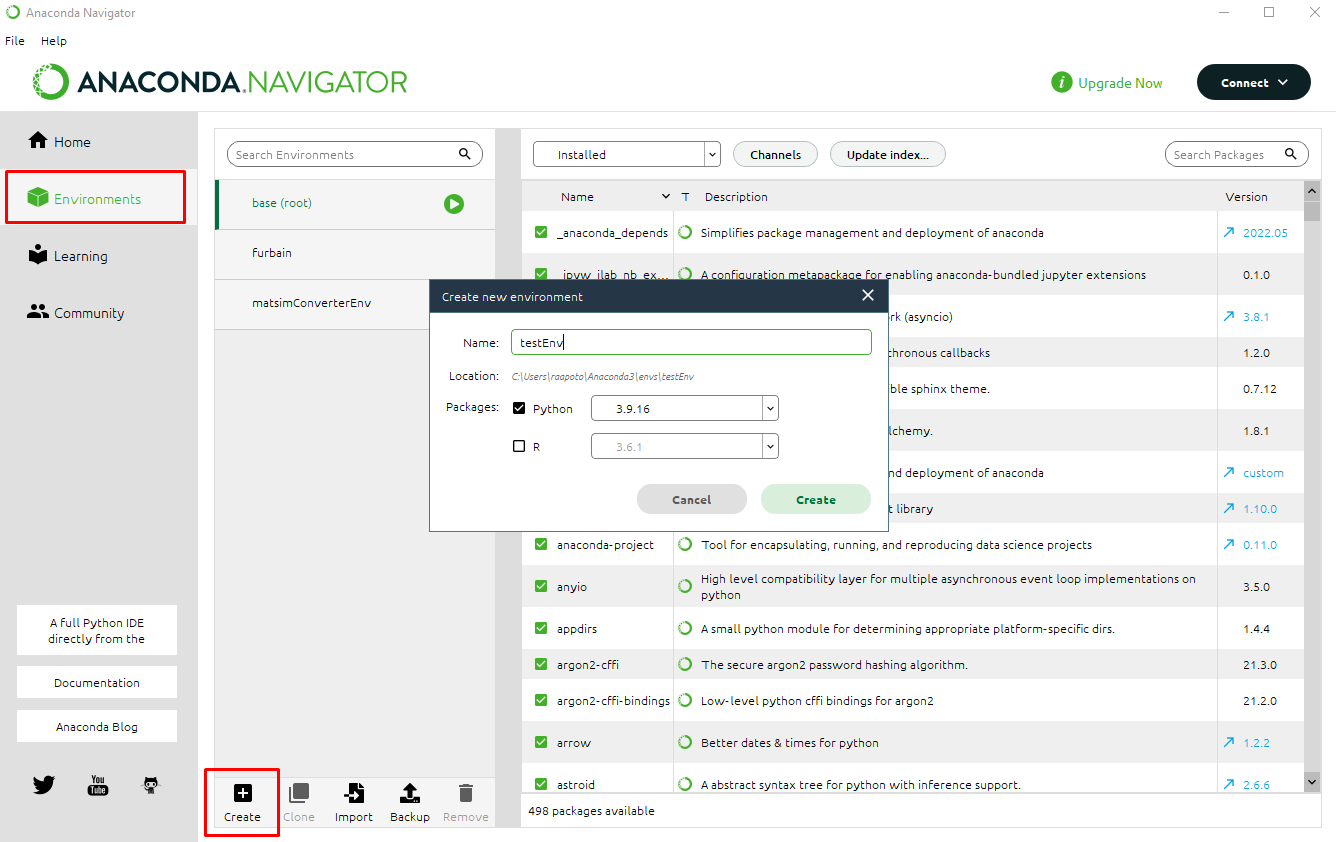
Give a name to your new environment and wait for the setup process to complete.
Once the environment is created, select it and launch an IDE like VS Code from Anaconda Navigator.

- Open a terminal in the IDE and run the command
pip install git+https://github.com/gabRpt/matsim-output-postgreSQL-converterto install the package.